Prerequisites
You should install the following software first:
- git (add to %PATH%)
- gzip binary (add to %PATH%), needed to decompress the QCustomPlot source from the command line
- Microsoft Visual Studio with nmake, C++ compiler, and debug tools. 2019 recommended (other versions may work too).
- For 32-bit: qt5, version 5.15.2 (scroll down to “Downloads for open source users”, there is no need to pay)
- Make sure to install these optional components too:
- qt creator
- qmake (add to %PATH%)
- Make sure to install these optional components too:
- For 64-bit: qt6, version 6.3.2. Place the preferred qt binary folder within the %PATH% variable ahead of any other qt versions. The folder is named like this:
C:\Qt6\6.3.2\msvc2019_64\bin - QCustomPlot (source files), version 2.0.1 (other versions may work too)
- Opus (use our build)
- RT Audio (clone from https://github.com/thestk/rtaudio, checkout ‘tags/5.2.0‘. No need to build, just clone it)
- PortAudio (use our build)
- Eigen (see Setup below)
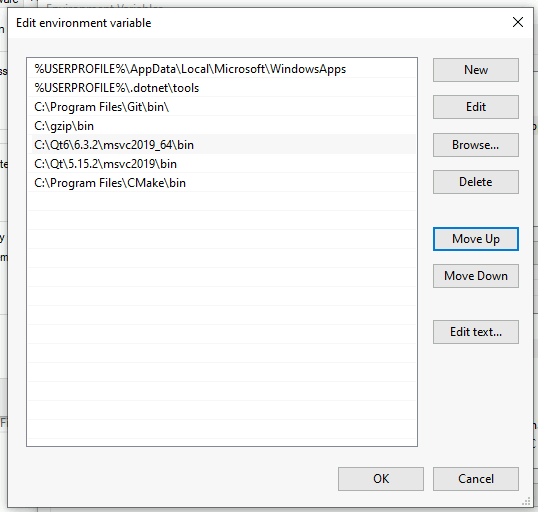
Make sure the version of qt and MSVC are compatible. My environmental PATH variable looks like this:
Setup
The following directory structure is recommended and how the wfview.pro file is designed to work. Please verify that the following files and folders exist. Assume the git command has been run from Documents/projects/wfview-master:
wfview source code: wfview-master/wfview
qcp header: wfview-master/qcustomplot/qcustomplot.h
qcp source: wfview-master/qcustomplot/qcustomplot.cpp
opus include: wfview-master/opus/include
opus library: wfview-master/opus/win32
RT Audio: wfview-master/rtaudio
Port Audio: wfview-master/portaudio/msvc/Win32/Release/portaudio_x86.dll
Eigen: wfview-master/eigen
(from the wfview-master directory, clone the repo: git clone https://gitlab.com/libeigen/eigen.git)
build directory: wfview-master/build
Clone the repository
cd wfview-master
git clone https://gitlab.com/eliggett/wfview.git
Command-line Build
To build from the command line, you can use build.bat, or follow these steps:
call "C:\Program Files (x86)\Microsoft Visual Studio\2019\Community\VC\Auxiliary\Build\vcvars32.bat"
This sets many of the necessary environment variables. (You can also just start by launching the “x86 Native Tools Command Prompt for VS 2019”)
Now make the directory for building, enter the directory, run qmake, and then nmake (nmake is apparently microsoft’s make):
mkdir build
cd build
qmake ..\wfview\wfview.pro
nmake
The resulting file is release\wfview.exe
qtcreator Build
Launch qtcreator
Open wfview.pro
Configure the project using the standard options.
Press Build. qtcreator will create a build directory for either Debug or Release, with the objects and executable.